How to create incremental backups in WordPress
There are three ways to back up incrementally with UpdraftPlus. But first, if you haven’t already, purchase UpdraftPlus Premium and follow the simple installation instructions.
Take an incremental backup manually
1. Open the UpdraftPlus plugin
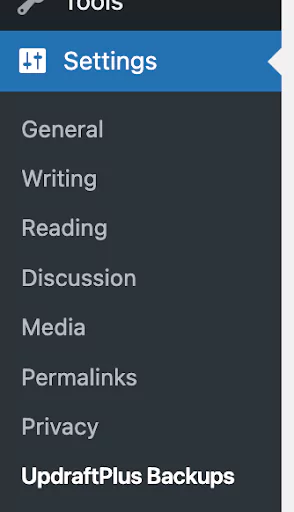
Go to the WordPress ‘Settings’ menu and open ‘UpdraftPlus Backups’.
2. Create a full backup
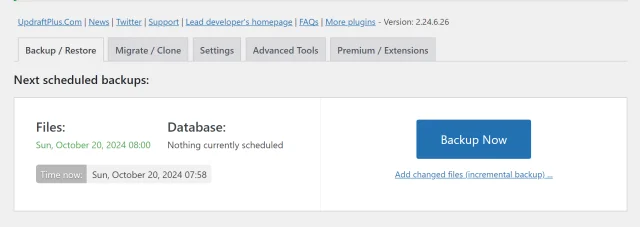
In the ‘Backup / Restore’ tab’, click the blue ‘Backup Now’ button to perform a full backup.
3. Add changed files to the backup (back up incrementally)
Click the text link under the ‘Backup Now’ button that says ‘Add changed files (incremental backup)…’.
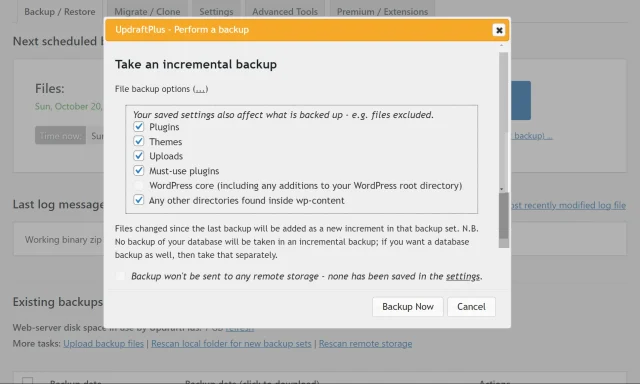
4. Select backup entities
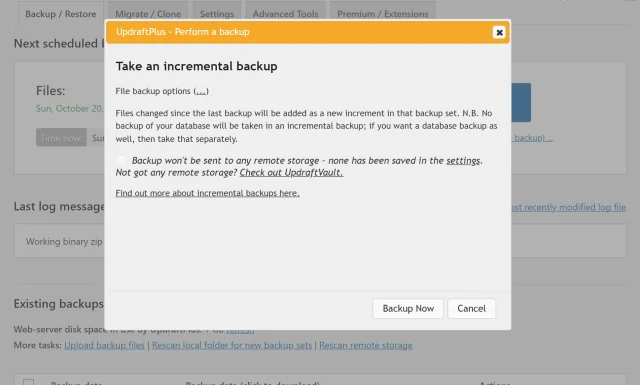
Choose what to include in the incremental backup.
Tick or untick ‘plugins’, ‘themes’, ‘uploads’ and ‘any other directories found inside wp-content.
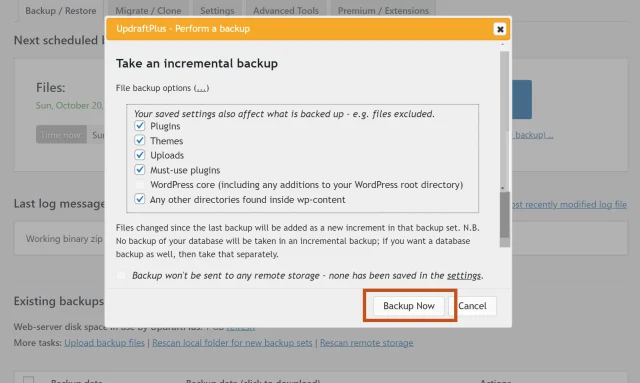
5. Initiate incremental backup
Click the ‘Backup Now’ button on the pop-up.
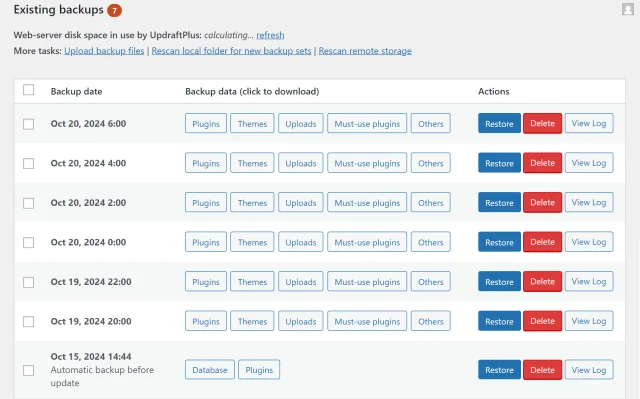
Your incremental backups can be found in the same place as your full backups under ‘Existing backups’ in the same tab as before.
Schedule incremental backups
1. Open the UpdraftPlus plugin
Go to the WordPress ‘Settings’ menu and open ‘UpdraftPlus Backups’.
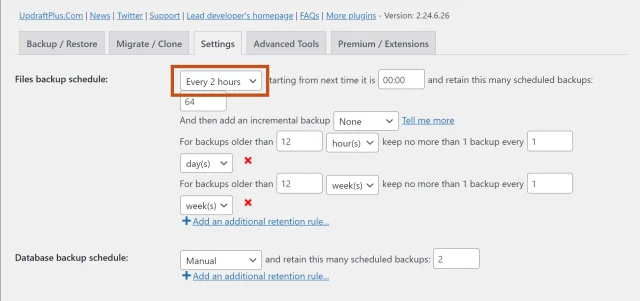
2. Schedule full backups
In the ‘Settings’ tab, choose how often you’d like to take a full backup and from what time. Choose how many backups to retain overall.
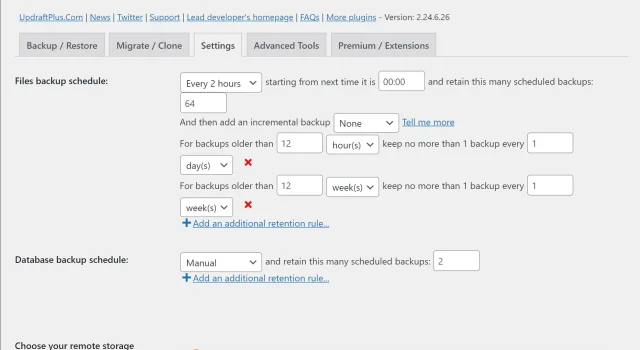
3. Schedule incremental backups
Tell UpdraftPlus how often you’d like it to add an incremental backup which can be every hour, every 2, 4, 8 or 12 hours or daily.
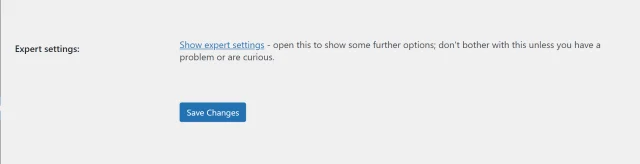
4. Save settings
Scroll down to ‘Save Changes’.
Incremental backups can be found in the same place as your full backups under ‘Existing backups’ in the same tab as before.
Take a manual incremental backup via WP_CLI
1. Set up WP_CLI
Install and configure WP_CLI (WordPress Command Line Interface) on your server.
2. Create a full backup
Use the following command to initiate a full backup of your WordPress system:
‘wp updraftplus backup’
3. Perform an incremental backup
Once you have a full backup, you can create an incremental backup by adding --incremental to the backup command like this:
‘wp updraftplus backup --incremental’
4. Verify your backup
Review the backup logs in the UpdraftPlus plugin interface to confirm the status of your incremental backup.
How to restore an incremental backup with UpdraftPlus Premium
1. Navigate to ‘UpdraftPlus Backups’
Go to the WordPress ‘Settings’ menu and open ‘UpdraftPlus Backups’.
2. Explore existing backups
In the ‘Backup / Restore’ tab, proceed to the ‘Existing backups’ section.
Find the file set that holds the incremental backups you want to restore.
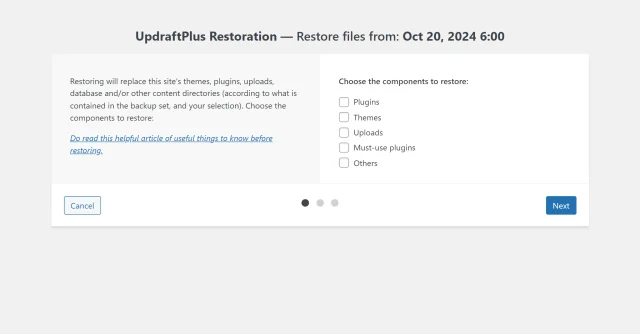
3. Select entities to restore
Choose the components to restore e.g. plugins, themes, uploads or other.
Click the ‘Next’ button.
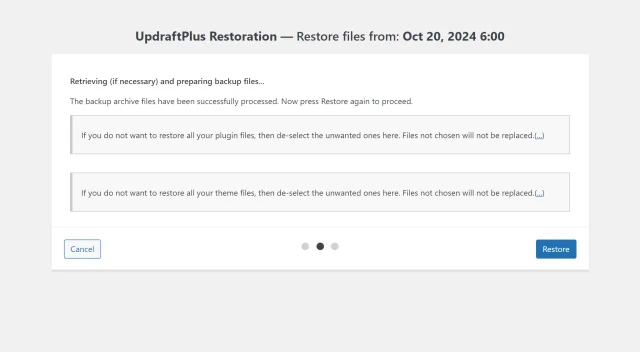
UpdraftPlus will prepare the files for restoration.
4. Restore incremental backup
Once preparation is complete, click the ‘Restore’ button.
UpdraftPlus will restore the selected components.