How to add Backblaze storage to UpdraftPlus
In this guide we’ll show you how to connect your Backblaze account to UpdraftPlus and save your backups.
If you already have your bucket set up, go to step 5.
1. Sign into Backblaze
Sign in to your Backblaze account.
2. Create your bucket
- Click the Create a Bucket button.
- Give your bucket a globally unique name.
- Click the Create a Bucket button.
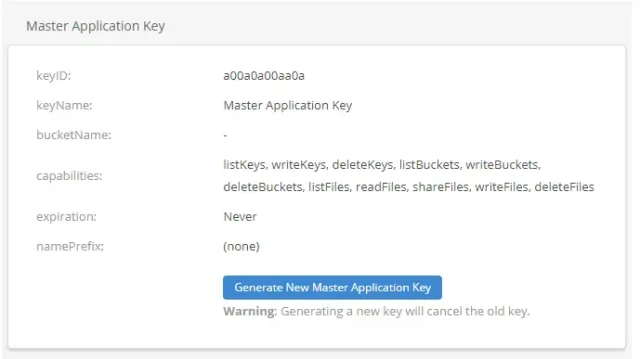
3. Copy Master Application Key ID
- Click the B2 Cloud Storage >> Application Keys link.
- Copy the Master Application Key keyID value.
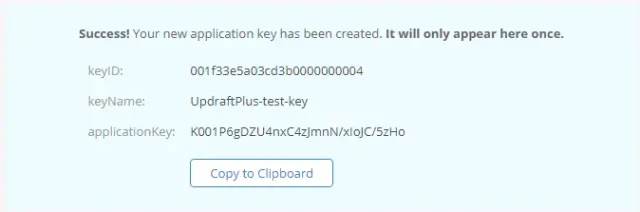
4. Generate Application Key
- Click the Add a New Application Key button.
- Name your key.
- Click the Create New Key button.
- Copy all of the credentials.


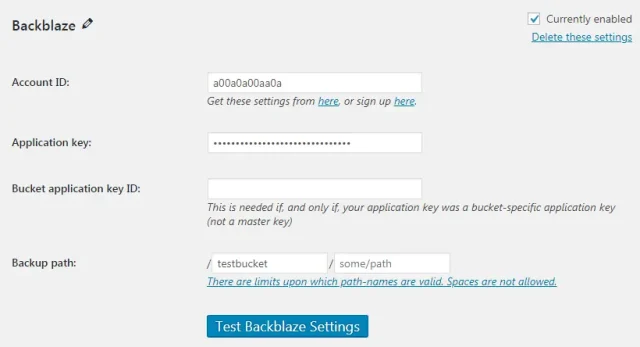
5. Select Backblaze
- Go back to your website.
- Click Backblaze on the UpdraftPlus >> Settings tab.
6. Enter your settings
- Scroll down to the new Backblaze section.
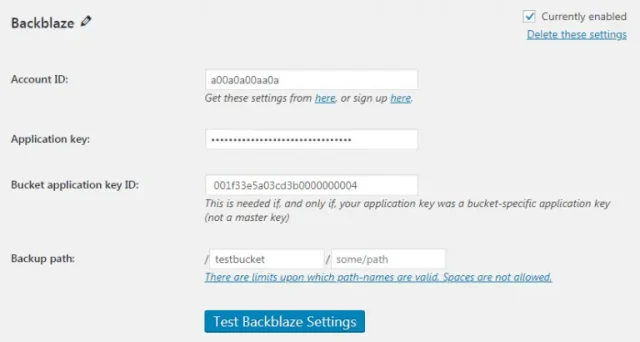
- Enter your master keyID in the Master Application Key ID field.
- Enter your application applicationKey in the Application key field.
- Enter your application keyID in the Bucket application key ID field.
- Enter the name of your bucket in the Bucket path field.
- Click the Save Changes button.
- Click the Test Backblaze Settings button to ensure everything is working.
7. Create a test backup
Click Backup Now on the UpdraftPlus >> Backup / Restore tab.
8. Start the back up process
- Check the options for Send this backup to remote storage and Backblaze.
- Click Backup Now.
9. That’s it
Your backup is secured on Backblaze and is accessible from UpdraftPlus >> Backup / Restore >> Existing backups.