Amazon S3 Enhanced
Store your WordPress backups on Amazon S3
Follow these steps to set up the Amazon S3 Enhanced feature. If you haven’t already, purchase, install and activate UpdraftPlus Premium.
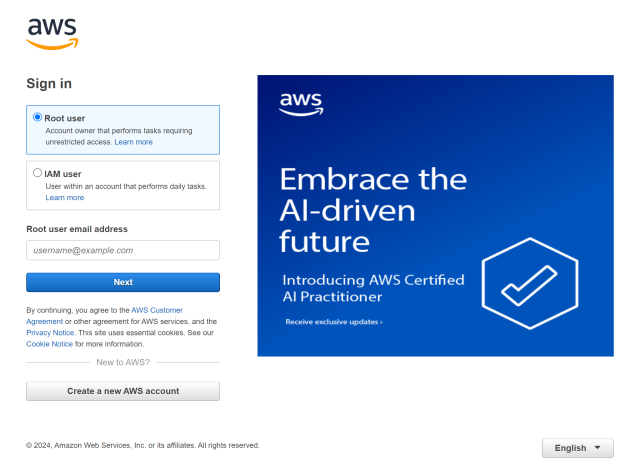
1. Sign into AWS Console
- Go to AWS console and sign in
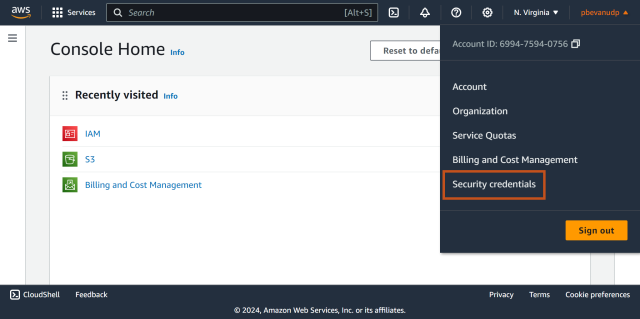
2. Go to the Security Credentials page
- Click your username in the top right of the screen.
- Click Security credentials
3. Set up access key
- Scroll down to the Access keys section
- Click the Create access key button
- Check the disclaimer checkbox
- Click the Create access key button
- Note both the Access key and Secret access key
- Click Done

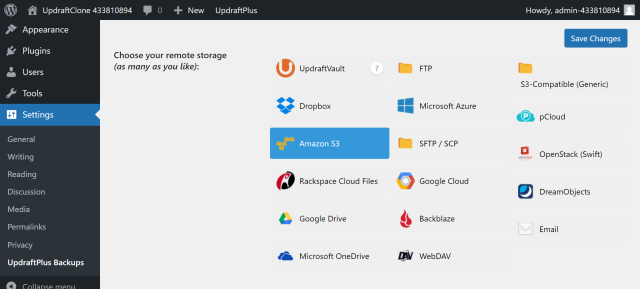
4. Select Amazon S3
- Go back to your website.
- Click Amazon S3 on the UpdraftPlus >> Settings tab.
5. Create an IAM user
- Scroll down to the new Amazon S3 section
- Click the link to open the IAM user wizard
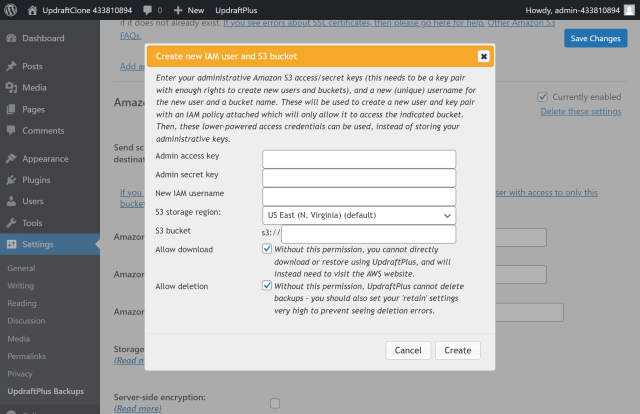
6. Enter your settings
- Enter your keys and choose an IAM username
- Enter your S3 bucket name
- Click the Create button
info
If you do not have a bucket set up, one will be created for you. The name of your bucket should be globally unique across all Amazon S3 users. We suggest using a random string of characters added to the end of your bucket name.
7. Add and save your settings
- Configure your options for storage class and server-side encryption
- Click Save Changes
- Click the Test Amazon S3 Settings button to ensure everything is working.
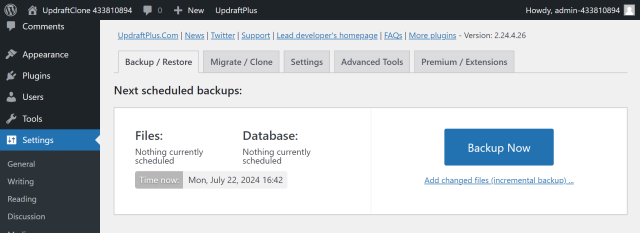
8. Create a test backup
Click the Backup Now button on the UpdraftPlus >> Backup / Restore tab
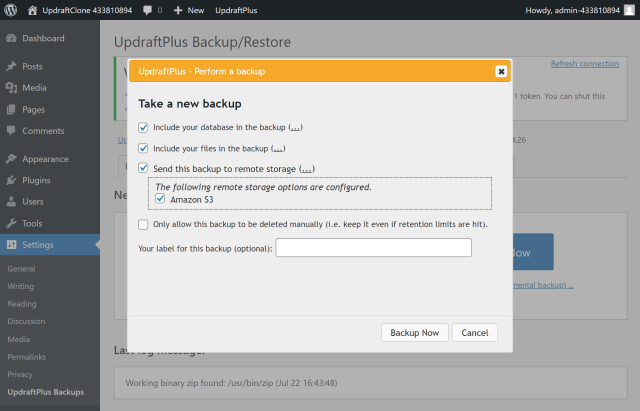
9. Start the backup process
- Check the options for Send this backup to remote storage and Amazon S3
- Click Backup Now
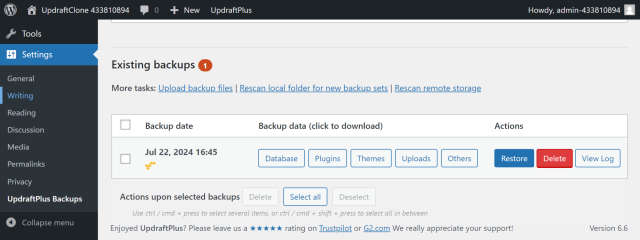
10. That’s it
Your backup is secured on Amazon S3 and is accessible from UpdraftPlus >> Backup / Restore >> Existing backups