How to install All-In-One Security
How to install All-In-One Security (AIOS) Free
All In One WP Security (AIOS) is a powerful and easy-to-use security plugin for WordPress. Follow these steps to install and activate it on your site.
Before installing AIOS, we strongly recommend deactivating any other security plugins you may have installed. Running multiple security plugins simultaneously can cause conflicts, unexpected behavior, or performance issues.
Step 1: Install and activate AIOS
- In your WordPress dashboard, go to ‘Plugins’ >> ‘Add New’.
- Search for All-In-One Security (AIOS).
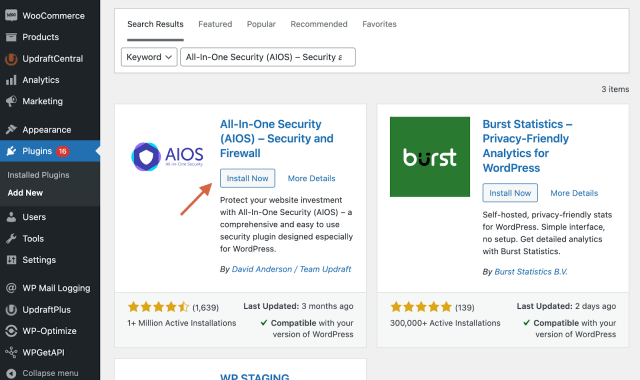
- Click ‘Install Now’, then ‘Activate’.

Step 2: Configure AIOS your settings (optional but recommended)
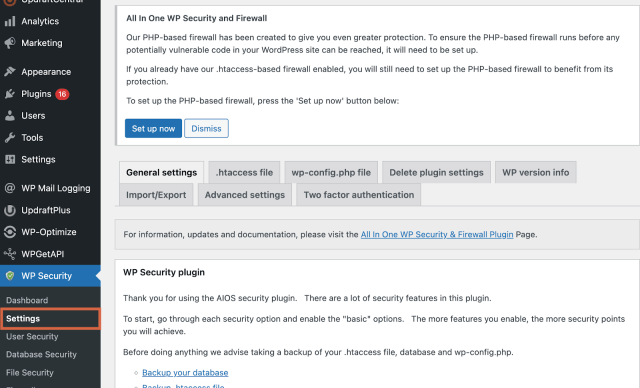
- After activation, go to ‘WP Security’ in the left-hand WordPress menu.
- Follow the setup wizard or manually adjust security settings in the settings tab.
- Set your firewall rules, login security, and other features based on your needs.
Need Help?
For assistance with AIOS Free, visit the WordPress.org support forums, where our support team can help with any questions.
How to install All-In-One Security (AIOS) Premium
Step 1: Purchase AIOS Premium
To install AIOS Premium, you first need to purchase a license. Head over to the AIOS pricing page to choose the package that suits you.
Step 2: Download AIOS Premium
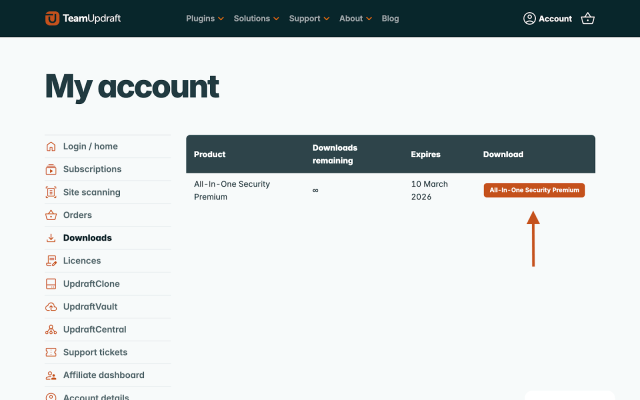
- Once you’ve made your purchase, head over to your account, and click ‘AIOS Premium’ in the downloads section.
-
- Save the plugin file to your computer. If you want some assurances before you download, check out the page for teamupdraft.com at Google Safe Browsing.
- Mac users – If you’re using Safari, your Mac may automatically unpack the ZIP file. This is not desirable for WordPress plugins. To prevent this:
-
-
- Go to Safari >> Preferences.
- Uncheck ‘Open safe files after downloading’.
-
Step 3: Install the free version of AIOS (if not installed)
AIOS Premium requires the free All-In-One Security (AIOS) plugin to function. If you don’t already have it installed, follow these steps:
- In your WordPress dashboard, go to ‘Plugins’ >> ‘Add New’.
- Search for All-In-One Security.
-
- Click ‘Install Now’, then ‘Activate’.
Step 4: Upload and activate AIOS Premium
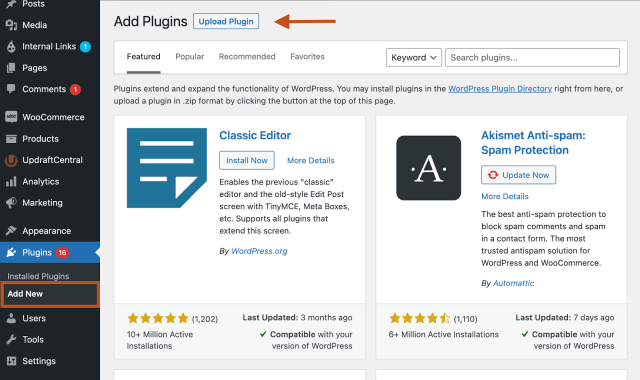
- In WordPress, go to ‘Plugins’ >> ‘Add New’.
- Click ‘Upload Plugin’, then ‘Choose File’.
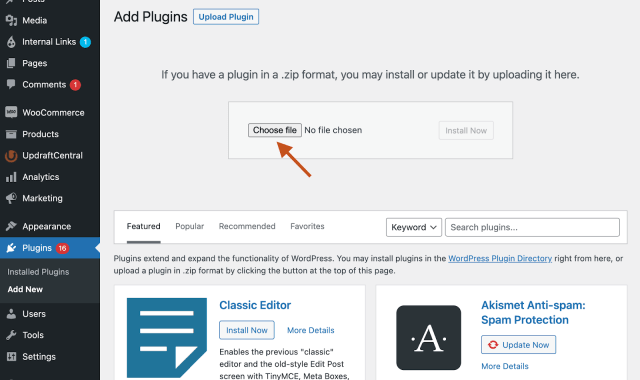
-
- Select the AIOS Premium ZIP file you downloaded.
- Click ‘Install Now’, then ‘Activate Plugin’.

If your hosting provider has a small maximum upload limit, WordPress may say the file is too large. In this case, you can install the ‘Upload Larger Plugins’ plugin from the WordPress directory, which allows you to upload files above the standard PHP upload limit.
Step 5: Connect your TeamUpdraft account
To receive updates for AIOS Premium, you need to connect your TeamUpdraft account (the account used to purchase AIOS Premium):
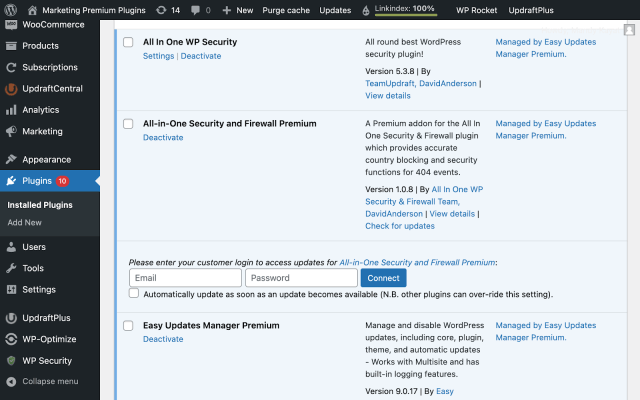
- In WordPress, go to ‘Plugins’.
- Scroll down to AIOS Premium (All-in-One Security and Firewall Premium).
- You will see a message: ‘Please enter your customer login to access updates for All-in-One Security and Firewall Premium’.
- Enter your email and password (the same credentials used for your TeamUpdraft account).
- Click ‘Connect’.
Need help?
Premium customers can get support via email. Just log a support query via our customer support form. Our team of experienced developers will email you back. More than 90% of tickets are responded to within 24 hours!